02 / Building block
LINE
Using line to describe, explore and communicate.
What is it?
A line appears when a drawing tool moves across a surface. Lines can change depending on how the tool is used. Pressure can make a line lighter or darker. Speed can change how steady or loose it becomes. The angle of a pencil, pen or piece of charcoal can change its width and texture.
Lines can show an edge, follow the surface of a form, divide a space or connect different parts of a drawing.
TODAY’S FOCUS
The way you move, press and hold a drawing tool changes the line you make.
Look
WHAT CAN A LINE DO?
Look closely at the lines in Gainsborough's drawing.
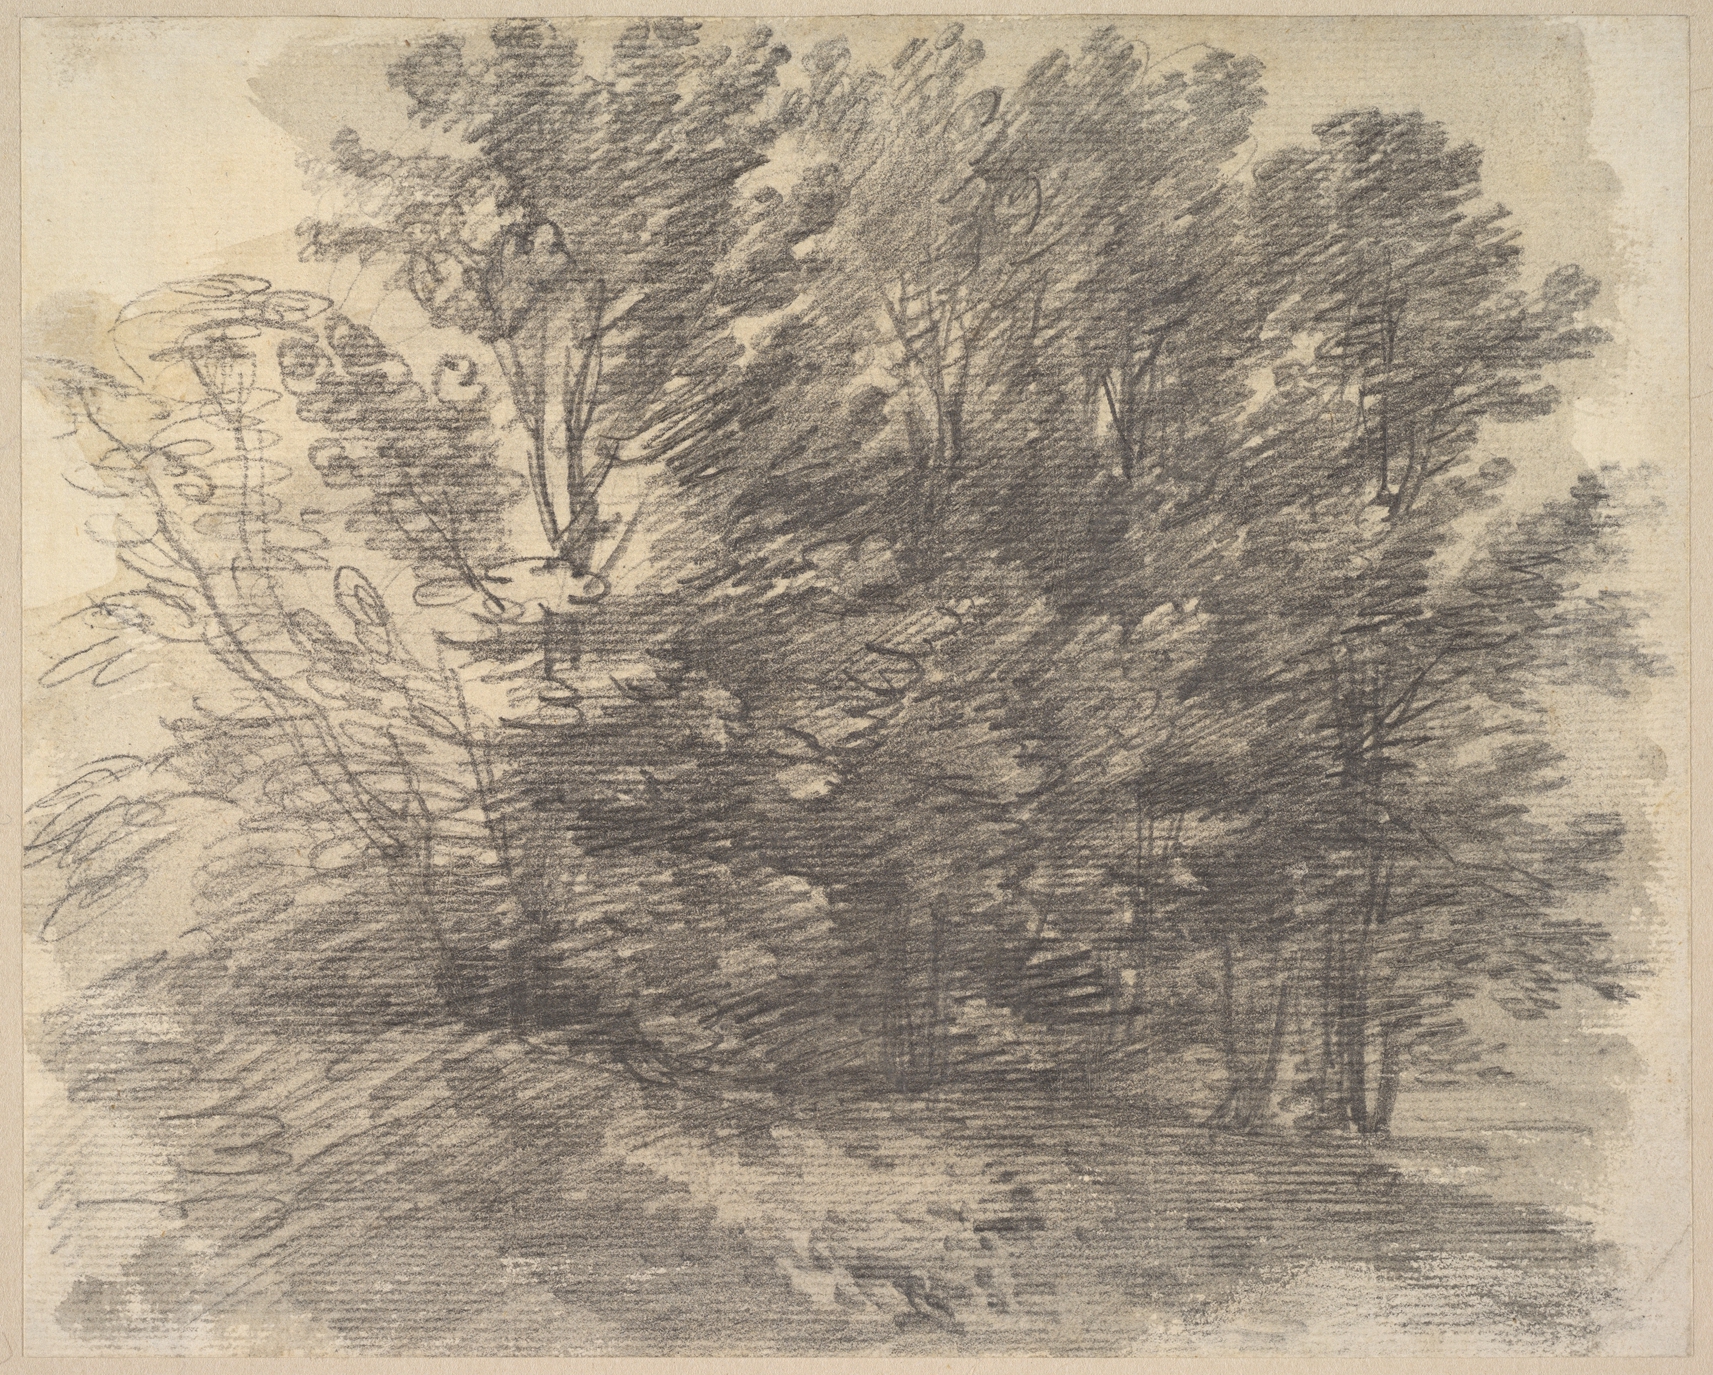
Look first.
Some lines are light and delicate. Others are darker and denser. Follow one branch with your eyes.
Where does the line become lighter, darker, thicker or less distinct?
Look at the clusters of leaves. What changes when the marks become denser?
Where does the drawing give you more information? Where does Gainsborough leave things open?
Try
ONE TOOL, MANY LINES
Find out what one drawing tool can do before you draw an object.
01 / Pressure, speed, angle and grip
Choose one pencil, pen or piece of charcoal. Before drawing an object, find out what the tool can do.
Try changing the pressure, speed, angle and grip. Make some lines slowly and some quickly. If the tool allows it, use the point, then the side. Hold the tool close to the point, then further back.
Look at what changes.
02 / What changed?
Which differences came from how you moved the tool? Which came from the material itself?
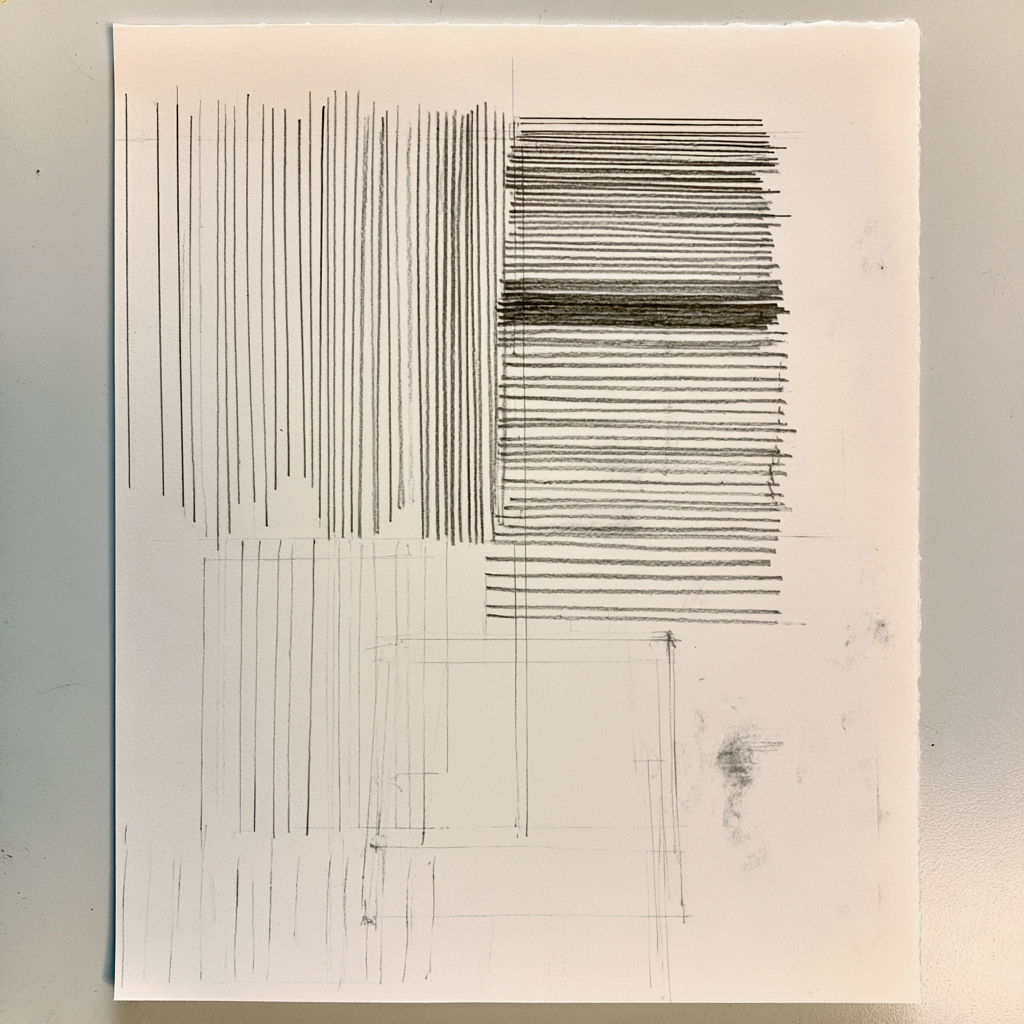
Studio exercise.
Pressure, grip and angle.
Pressure, grip and angle. Studio diagram.
Materials
Material encounter
WHAT CHANGES WITH THE TOOL?
Find out how each drawing material behaves.
Pressure, angle and grip can change the weight and quality of the line.
The width changes less, so speed, direction, repetition and overlap become more noticeable.
The point, edge and side can produce very different widths and textures.
Make the same kind of line study with another material. What changes? What becomes easier to control? What becomes harder?
Understand
LINE FOLLOWS FORM
A contour line can follow an edge or travel across a surface. When a line moves across a rounded form, its direction changes with the surface. This can help a flat drawing describe three dimensional form.
The direction of a line can describe the surface it is moving across.
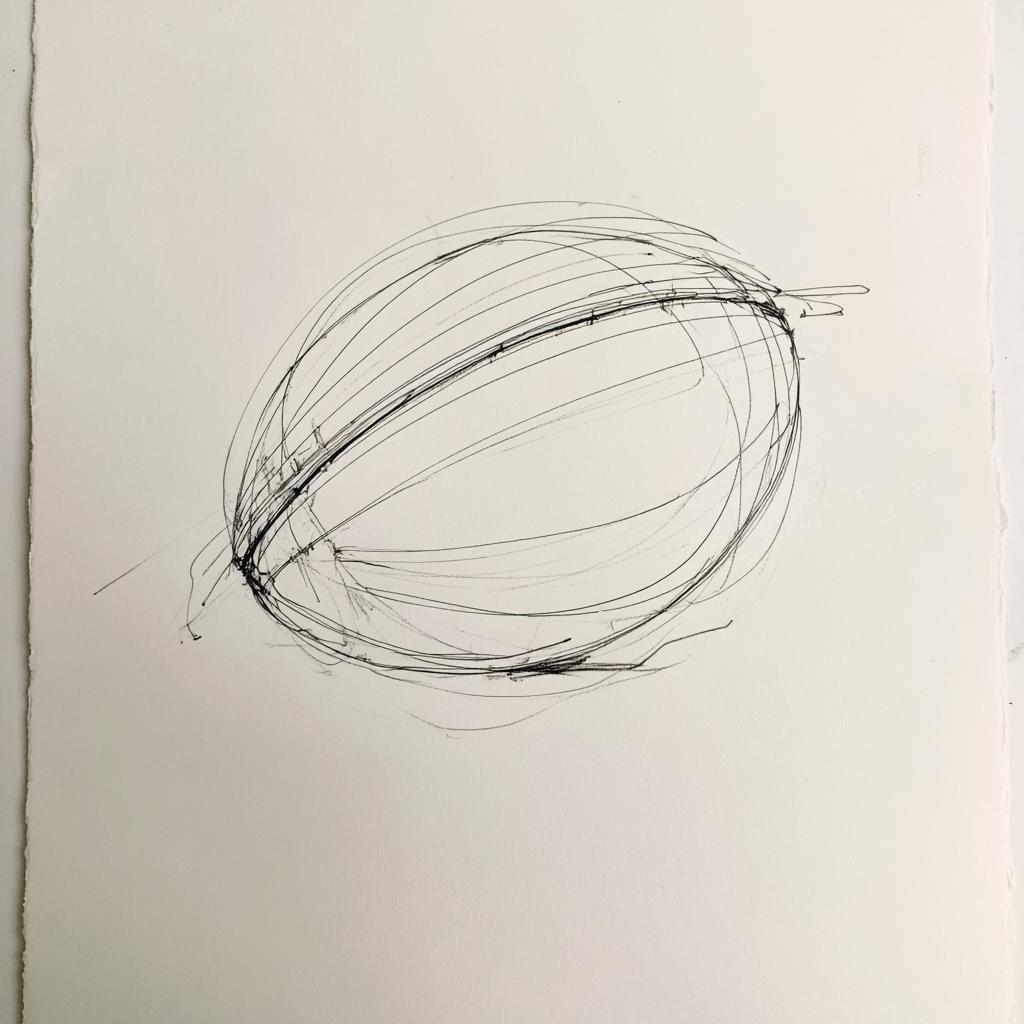
Studio exercise.
WATCH
FOLLOW ONE LINE ACROSS THE BALL WITH YOUR EYES. WHAT HAPPENS TO THE CURVE AS IT MOVES TOWARDS THE EDGE?
Make
Choose the amount of support you need today.
Choose an object with a form you can follow with your eyes. Allow the line to describe edges and move across surfaces. Keep looking back at the object as you work.
- 01 / Choose
Choose an object with a form you can follow with your eyes.
- 02 / Look
Look at the whole object before adding detail.
- 03 / Begin
Use light lines to establish the object.
- 04 / Follow
Let some lines follow edges and some travel across the form.
- 05 / Change
Vary pressure, direction or speed where you see a reason to.
- 06 / Look again
Compare the drawing with the object. Allow lines to change as you notice more.
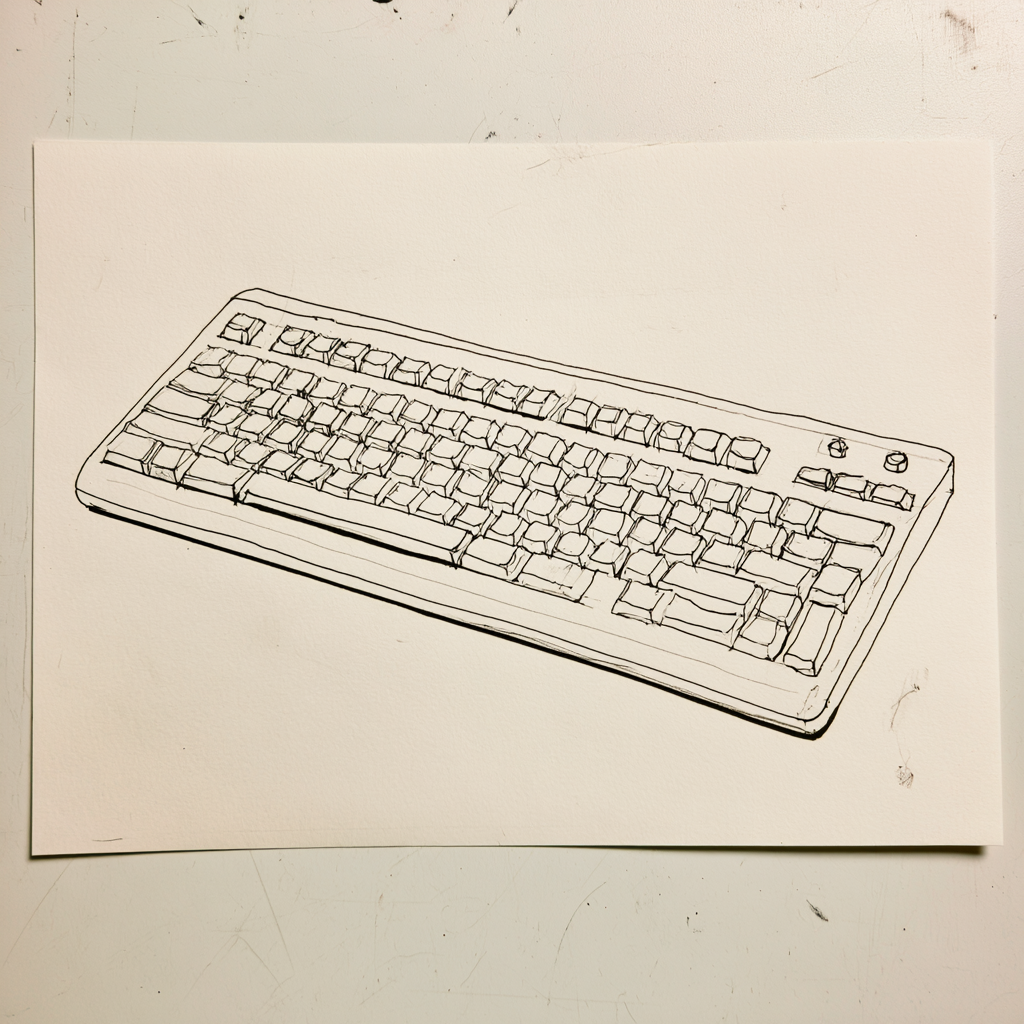
Studio exercise.
Look again
MAKE → LOOK → ADJUST
Step back from your drawing. Where does the line feel most certain?
Where did you have to look again?
Where could a line become lighter, heavier or change direction?
What happened when you corrected a line rather than erasing it?
In practice
DIFFERENT PURPOSE, DIFFERENT LINE
The line you choose depends on what the drawing needs to do.
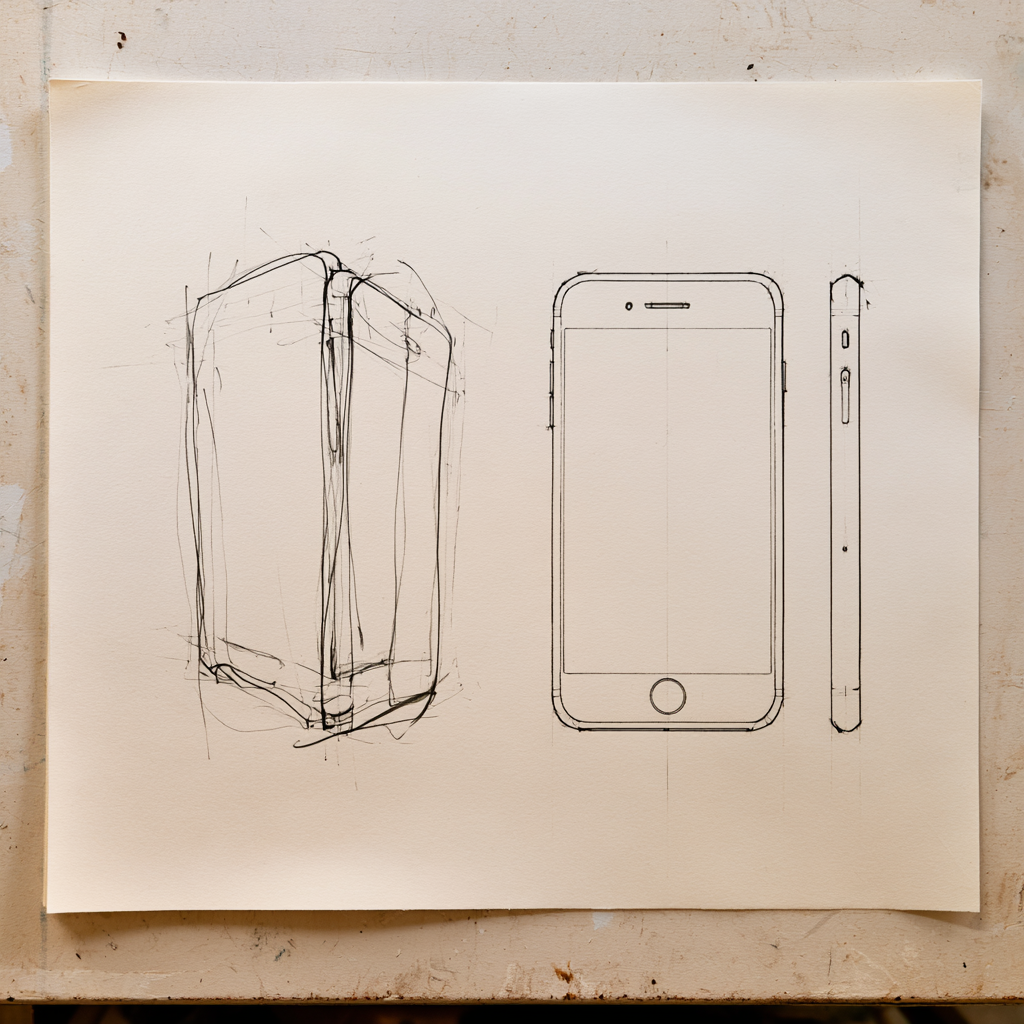
Studio demonstration.
Line can become part of your visual language. Experiment with weight, direction, repetition, density and material and notice how these choices affect the way the work communicates.
Explore how different drawing materials and techniques change the qualities of line. Record what happens so you can decide which processes you want to develop or refine.
The line you choose depends on what the drawing needs to communicate. Development drawings can use rapid, informal and expressive lines while ideas develop. Documentation drawings use technical conventions to define and record specific information.
Creative thinking
Where does a change in line pull your attention?
What changed when you changed pressure, speed, angle or material?
Keep one trace of the experiment. Draw, photograph, label, note, arrow, circle or question.
Tools to help you notice, describe, question, develop and document your work.
Curriculum + reading
Bowden, M., & Tooke, A. (2022). Art making and exhibiting: VCE units 1–4. Cambridge University Press & Assessment.
Greenwood, D. (2023). Art creative practice: VCE units 1–4. Cambridge University Press & Assessment.
Guthrie, K. (2017). Nelson visual communication design: VCE units 1–4 (4th ed.). Cengage Learning Australia.
Victorian Curriculum and Assessment Authority. (2022). VCE Art Creative Practice study design 2023–2027. vcaa.vic.edu.au ↗
Victorian Curriculum and Assessment Authority. (2022). VCE Art Making and Exhibiting study design 2023–2027. vcaa.vic.edu.au ↗
Victorian Curriculum and Assessment Authority. (2023). VCE Visual Communication Design study design 2024–2028. vcaa.vic.edu.au ↗
Artists + artworks
Gainsborough, T. (ca. 1757). A clump of trees [Graphite, brush and gray wash]. The Metropolitan Museum of Art, New York. Object no. 2013.100. Public domain. metmuseum.org ↗
Studio material
One Tool, Many Lines.
Line Follows Form.
Direct Line Study.
Different Purpose, Different Line.
Pressure, Grip and Angle.
Visual material: Studio work, 2026.